19 Jan 2013

New year - new approach to enhance my photography

When I looked back at my photos taken last year I quickly come to the conclusion that many of them could be better. I think it is a good observation, since awareness of own deficiencies is the first step on a way to fix them.
Here's how I am going to tackle some of the issues I have with my photos:

  1. Study work of others more carefully
    This is something I need to do more systematically. I am going to keep it simple: look for inspiration on the sites like 500px.com, viewbug.com, read the books about photography (in 2013 I will concentrate on landscapes - one of the types of photography I do a lot), find best landscape photographers on the web and follow them
  2. Shoot, learn, shoot again
    As simple as that: take a theme to photograph, see what can be improved, repeat. One example here: begin of January I went with some guys to Rotterdam for a photowalk. When I compared my results with the results of others I realized how I could do things better. So I planned to go back to Rotterdam in February and improve some shots. 
  3. Learn from the professionals
    This is actually ongoing, since it has proven to be effective. I follow the courses on kelbytraining.com. They gave me a lot of insights last year, and this year I'll continue.

26 Dec 2012

Playing with the rim light

During this year's portrait session I was using a rim light for the first time. I have used a self-made rectangular softbox equipped with the flashlight as a light source. My idea was to create a contour line along one side of the face and the shoulders of the model.
To make the finetuning easier other light sources were switched off. So I could see the result of this particular light only.
It turned out that proper placement of the softbox relative to a model was the most challenging task. First attempt was to just put a light source right to the model (picture left):

The effect is not fully as I wanted. Obviously, the right part of the model's body is lit, but the contour line along her body is actually not visible. The next attempt was to move the light source a little behind the model, projecting the light slightly from her back:
This is much more satisfactory. The line along model's right arm and head is more visible. Sure I lost some light on her face, but it would be compensated by the other light sources.
The final position of the rim light source became eventually like that:


9 Dec 2012

Extend multiple flash setup applications - cheap and efficient

Sometimes (well, probably more often than I would like to) I experience the situation when the system that I thought and use during my photography assignments doesn't work as I expected. This happened during my last portrait shooting.

The problem I had was manifestated with the close-up portraits:
Since I was using the iTTL system of Nikon, it was required that all three light sources needed to be in the line of sight of the master flash, placed on the camera. The problem was with the rim light source (C). Since it was a strip softbox (30x100 cm) and it was quite deep (30 cm), the flash unit placed at the rear side of the softbox was not always reachable by the master flash. There are several options to solve it (at least that I came with in the first instance):
  1. Put the omnibouncer on the master unit to create the broader light bundle used for controlling other flashes
  2. Use a radio frequency wireless trigger
  3. Don't come so close to the subject (for example by using a lens with a longer focal length)

The first option helped a bit, but didn't solve the problem completely. To be honest, it was required anyway, to control the base light (A) in a reliable way.
The second option is nice, but I don't have a wireless trigger and my budget for photography is for this year really, really up.
Third option is the probably something I'd love to try, if I had a proper lens. I was shooting with the 24-70mm lens. If I had a lens with a longer focal lenght (e.g. 70-200) that would solve my problem. And I think it would also create a lot of new opportunities for the composition of a close up portrait, but alas - something for the future.

There is actually a fourth option, coming from the observation that iTTL is a one-way control system, where the master unit sends the control signals in the form of short light pulses. So the basic light principles, like the reflection of light apply for these signals. The solution was born. I simply put a highly reflective surface ensuring the light from the control unit reaches the remote flash. Something like on the picture below:

Now the best part. The "high reflective surface" was a silver foam that is used to protect the windscreen of a car from freezing. To buy in the Netherlands for 2 or 3 Euro.
The result: 100% efficiency in the controlling of the rim light.

2 Dec 2012

School portrets season is over - learnings and looking forward

The shooting of portraits for the Polish school in The Hague for 2012 is finished. Today I sent last photos for printing. As each year I try to put a new challenge on the area of photography and to experiment with something new. After all, it should be fun for everyone, including a volunteer photographer.

So this year I was using 3 light sources for the first time, building a classical setup: base light in front of the subject, left or right, background lighting to lit the background and the rim light coming from the  side, slightly behind the subject:

The light sources I have used for the setup were as follows:
- Base light (A) Lastolite's EzyBox Hotshoe 76x76cm powered with SB-900 in iTTL mode
- Background light (B): SB-600 placed on a boom arm behind a Lastolite's Tri grip diffuser. SB-600 set in manual mode on 1/4 of maximum power.
- Rim light (C): self-made 30x100 cm softbox with SB-900 set in iTTL mode.

The setup was controlled by the SB-910 flash placed on the camera.

The light setup was partially dictated by the background:
It felt more naturally to put the background light to the right letting the light travel along the lines formed by the orange clouds. So is the main light was placed also left to the photographed subject.

Before shooting I needed to decide whether to use a laptop and shoot in tethered mode or not. Finally I decided not to do so, mainly due to the number of children and the expected crowd and hectic during the session.

So what were the challenges this year? Here the list of most important ones:
1. Place the rim light efficiently to create the desired result,
2. Determine the limits of iTTL system and learn how to use it in such situations,
3. Learn how to deal with iTTL when there is no line of sight between the master flash and the remote units (and not ruin your budget),
4. Streamline the workflow during the session and during the post-processing efficiently so it doesn't take ages to come to the photos.
5. Fine tune the light setup to let children shine on a portrait (some information about it in my previous post)
6. Place the larger groups in front of the background of a limited size.

In coming posts I will take each challenge one by one and describe what I did to overcome it.

25 Nov 2012

Using a wide angle lens - my experiences

Some time ago I was involved in a little discussion on G+ about advantages of using the wide angle lens. I promised the guys to share some of my experiences with using it. So here we go.

My motivation for wide-angle lens

I started using the wide angle lens for shooting landscapes, after studying some stunning photos on the Net and asking myself how people made them. And after buying my lens (Tokina 11-16/2.8 DX) I wasn't disappointed:


In parallel I also started to analyse what makes the wide-angle lens so special. Because it is not only the fact that this kind of lens enables to capture a broader area. Another important aspect are the noticeable distortions being an integral part of the wide-angle lens. Sometimes it adds something to the picture, sometimes the opposite. In the picture above the distortion is good visible in the upper part of the image and on the right side of it. Because there are the clouds and they are supposed "to flow" on the sky, the distortion emphasizes the effect, working well.
But be aware that it can work also against you:

This photo shows the so called 'ball apartments' in 's Hertogenbosch, The Netherlands. They are all, well, ball shaped. On the picture only those in the middle have the proper shape. The balls on the edges of the picture are distorted by the lens. I experienced that it is not always easy to deal with it in post processing. So be aware.

Other applications

Playing with perspective

Wide angle lens has another interesting feature: it introduces a 'perspective distortion', so the objects closer to the lens appear bigger than the objects being more distant from the lens. The relative difference in size between close and distant objects is bigger than in case of regular lens (again, due to the distortions). This trick is used quite often in architecture photography. I have also tried it:


In both examples above the physical distances between foreground and background objects were not as big as it appears in the photos. And the first plane is made more dominant by an illusion of making it bigger. Again, sometimes it works, sometimes not.

Coming closer to the subject

Because of wide-angle one has possibility to get closer to the subject and still have it fully in the frame. This is sometimes advantageous; take a look at the following picture:
When taking this picture I could come so close to the cathedral that there was nobody walking in front of me.
But you see that this technique comes with the price: the perspective distortion are much more visible with the wide angle lens than with the other ones. Even a small tilt of the camera causes the vertical lines to incline dramatically. In the picture above it works because of the character of the building, but in the picture below perspective distortions make the picture actually unacceptably malformed:


But being able to get closer can make your picture:
Just to give an impression: here the lens was placed about 0,75 m in front of the wheels (which are about 2.5 meters high). Try to do it with a regular lens.

To buy or not to buy?

Personally I think it is a good thing to have a wide-angle lens in my photo bag. It is the lens that works often as a double-edge sword, giving me something extra at cost of something else (photographing from close distance vs. perspective distortions, broaden the composition at cost of distortion in the edges). But it enriches my shooting possibilities for sure.


18 Nov 2012

Don't blame your gear, think

Christmas portrait season is started already, at least with respect to my yearly assignment I take at Polish school in Hague, The Netherlands. The idea is simple: each year I take portraits of the school pupils and the Parents Council sells the paper copies and creates in this way some extra income which is later spent by parents during organizing some attractions for children.
After some experiments done in the previous years we decided together with parents to take two photos per child: full length portrait and the close-up with upper half of the body.
The whole event is a common effort of parents, teachers and a photographer (I will write maybe later more on the logistics), now some observations about the light setup and why a photographer has to think every now and then.
The light setup is quite standard: main light is provided by Ezybox softbox at the front of the subject, the background is lit by a flash mounted on a boom arm with some help of the reflection from the ceiling. The third light source is coming from a self-made softbox providing narrow beam of light to be used as a rim light to lit one side of the subject. The picture below illustrates it. Note that the setup is not fully fine tuned yet, but the idea is already there.

Basic light setup of the portrait session
Ok, now the session. The close up portraits have been taken with a subject standing 2,5 meters away from the background, which worked nice: the subject lit by softbox and the rim light was obviously lighter than the background, nicely popping out. Just for the records: photos have been taken in Nikon iTTL mode, with background adjusted to -1.7 stops and the rim light to -1 stop.


The full length portrait was more challenging. The subject had to be placed closer to the background (to compose it better with the scenery). The challenge was to ensure the same effect as with the close-up: bright subject clearly popping up from the background. It wasn't working. Tweaking iTTL adjustments of main light, changing the background light strength, switching it off. No way.

 The easiest to blame is the gear (of course) that doesn't work, but at the end there is only one in control - a photographer.
And after giving some thoughts it was clear. The reason of 'failing' iTTL was actually the relative distance between the main light source (softbox), the subject and the background. It is just impossible for a softbox light placed 3 meters from a subject to fall off so quickly that there will be a noticeable difference between the subject (3 meters from a light source) and the background (4 meters from a source).
To deal with it the relative distances would need to be changed. How?
I have some ideas to try next week:

  • Keep the subject in the same position for both portraits, take two shots from different positions. May be difficult due to the position of the softbox that would become visible in the full-length composition
  • Bring the main and rim lights closer to the subject for a full length portrait. Would work best (probably), but the issue is that during the day I need to take 90 (x2) portraits, which is quite some amount and moving around with the light setup after each photo is rather not an option.
And thinking - yes, it always helps.

29 Sept 2012

After my first Dutch Photo Walk - technicalities

Previously I have shared some thoughts about my participation in the Dutch City Walk. In this post I would like to share some technical aspects of the event. Note that most of my observations refer to the other topics, like "Street photography", "Shooting people", "Post processing".

Before

Check the proposed route in advance. It will help you to identify the potentially interesting spots and to pre-visualize the route.
Check the weather forecast. There is a couple of hours walking and you need to feel comfortable, without hassle of too cold, or too warm clothing. And, if it is going to rain, don't forget to take a proper stuff for protecting your gear. What I take with me is a rain sleeve, a small towel and a lens cleaning cloth. 
Obviously, take enough memory cards and fully loaded batteries.
More tough questions to answer are: which lens (or lenses) to take, to take or not a tripod. Before the photowalk I wasn't sure so I have asked other co-walkers. So learn from each other.
Finally I took the 24-70/2.8 lens (which, by the way, became my workhorse) and as a reserve a 18-200/3.6-5.6 lens. I didn't take a tripod because the interesting indoor places (like churches) were either in renovation or closed.

During

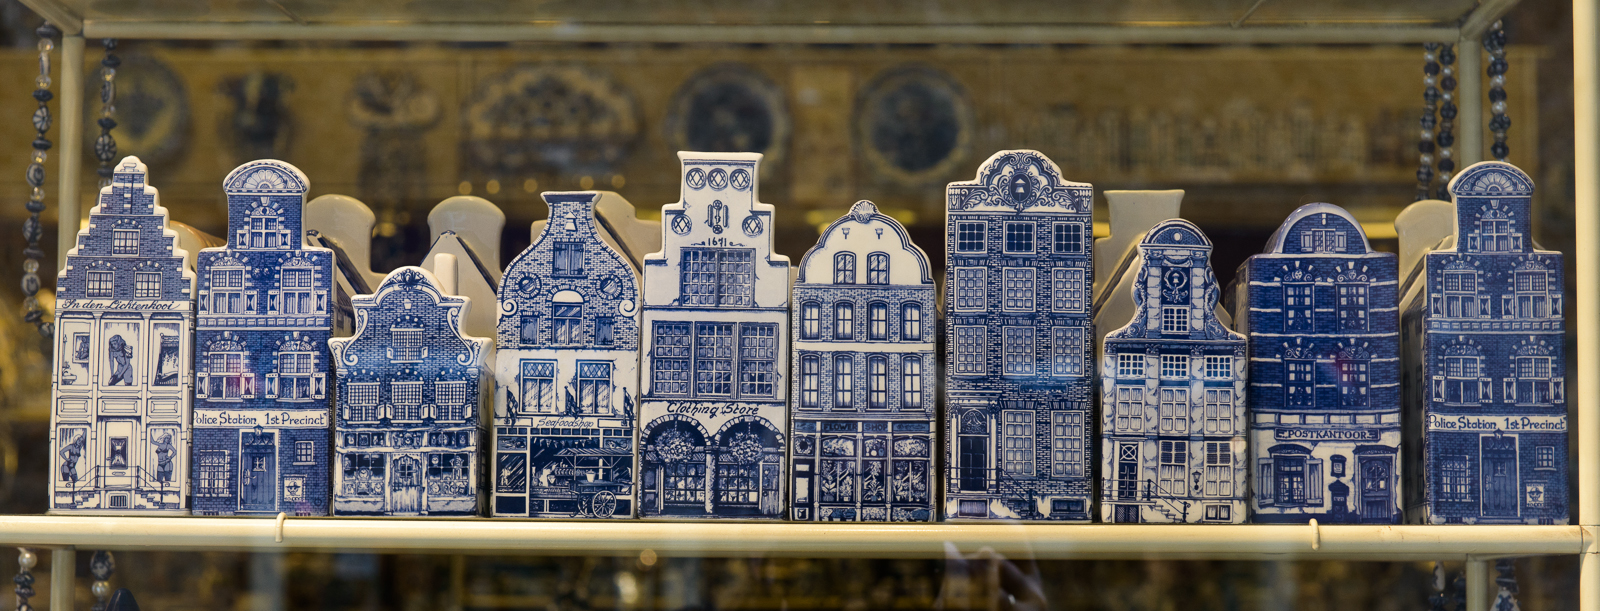
Personally I like to work lately with a predefined theme (and for this photowalk it was Delftware.
So the pictures like these were taken:

But in practice it is a walk and interacting with other people. So the photographic theme evolved during the walk. And it is a city, so I got inspired by a lot of interesting stuff:


My advice is also to look every now and there what other co-walkers are doing. You can learn a lot, and sometimes take interesting shot of them:

On the technical side: I tried to keep the camera settings as simple as possible and as universal as possible. Each moment something interesting can happen and I didn't want to ruin my photo just by having wrong settings. Here's what worked for me: the camera in the Aperture mode with auto-adjust ISO settings and with the second command dial button set for exposition compensation.
Every now and then I have switched the bracketing on, but kept it very simple (just 3 shots, under-, normal-, and over-) exposed with the F-stop distance between them set to 1. One important note,
I learned to switch bracketing mode off practically after each shot taken. For very simple reason: I wanted to be prepared for the next shot, starting from the stable set of settings. Forgetting to switch off bracketing can cost you unexpected under- and overexposed images.

So I kept the camera settings actually quite basic and simple and was able to focus more on the composition of my photos and on looking for the interesting places.

After

Generally first thing that I wanted after the event was to share the photos with the rest of the group and see what other did. And because group was so enthusiastic about the photography, first results were published the same evening. Discussions about the photos started, +1 on G+ were given.
For me it was important to see how others see the same places I saw through their camera. Again: a great learning moment.