Previously I have shared some thoughts about my participation in the Dutch City Walk. In this post I would like to share some technical aspects of the event. Note that most of my observations refer to the other topics, like "Street photography", "Shooting people", "Post processing".


Before
Check the proposed route in advance. It will help you to identify the potentially interesting spots and to pre-visualize the route.
Check the weather forecast. There is a couple of hours walking and you need to feel comfortable, without hassle of too cold, or too warm clothing. And, if it is going to rain, don't forget to take a proper stuff for protecting your gear. What I take with me is a rain sleeve, a small towel and a lens cleaning cloth.
Obviously, take enough memory cards and fully loaded batteries.
More tough questions to answer are: which lens (or lenses) to take, to take or not a tripod. Before the photowalk I wasn't sure so I have asked other co-walkers. So learn from each other.
Finally I took the 24-70/2.8 lens (which, by the way, became my workhorse) and as a reserve a 18-200/3.6-5.6 lens. I didn't take a tripod because the interesting indoor places (like churches) were either in renovation or closed.
Finally I took the 24-70/2.8 lens (which, by the way, became my workhorse) and as a reserve a 18-200/3.6-5.6 lens. I didn't take a tripod because the interesting indoor places (like churches) were either in renovation or closed.
During
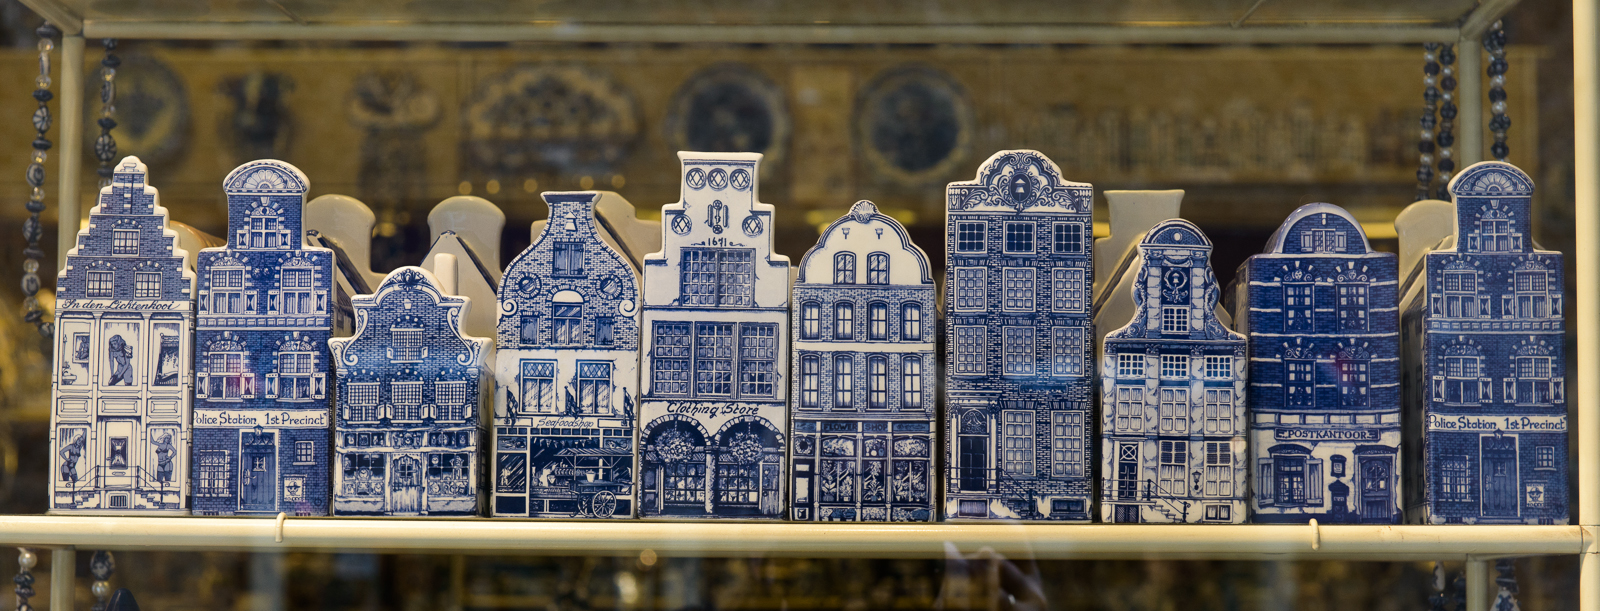
Personally I like to work lately with a predefined theme (and for this photowalk it was Delftware.
So the pictures like these were taken:
But in practice it is a walk and interacting with other people. So the photographic theme evolved during the walk. And it is a city, so I got inspired by a lot of interesting stuff:


My advice is also to look every now and there what other co-walkers are doing. You can learn a lot, and sometimes take interesting shot of them:

On the technical side: I tried to keep the camera settings as simple as possible and as universal as possible. Each moment something interesting can happen and I didn't want to ruin my photo just by having wrong settings. Here's what worked for me: the camera in the Aperture mode with auto-adjust ISO settings and with the second command dial button set for exposition compensation.
Every now and then I have switched the bracketing on, but kept it very simple (just 3 shots, under-, normal-, and over-) exposed with the F-stop distance between them set to 1. One important note,
I learned to switch bracketing mode off practically after each shot taken. For very simple reason: I wanted to be prepared for the next shot, starting from the stable set of settings. Forgetting to switch off bracketing can cost you unexpected under- and overexposed images.
So I kept the camera settings actually quite basic and simple and was able to focus more on the composition of my photos and on looking for the interesting places.
After
Generally first thing that I wanted after the event was to share the photos with the rest of the group and see what other did. And because group was so enthusiastic about the photography, first results were published the same evening. Discussions about the photos started, +1 on G+ were given.
For me it was important to see how others see the same places I saw through their camera. Again: a great learning moment.
No comments:
Post a Comment