Recently I had an assignment to take photos of the several school classes. The final 'product' were the standard group photos of school classes:

Although it looks simple, there are some aspects and potential challenges that require at least some attention.


Although it looks simple, there are some aspects and potential challenges that require at least some attention.
The location and lighting
Choosing the right spot for a shoot is not trivial, especially when the only available location is a school playground: a lot of open space with the school building as the background. Not very exiting, I'd say. Additional problem was the full sun at this day which would guarantee harsh shadows on the faces of the children. Luckily, at the border of the playground there were some trees that gave enough shadow to cover the whole group. Shadow coming from the tree provided decent light for the shoot: diffused on one side, but bright enough to be able to shoot with the 1/100s, f/7.1 and ISO 200.
Last but not least, the trees served as a nice background for the photo. My setup looked as shown in the picture below:
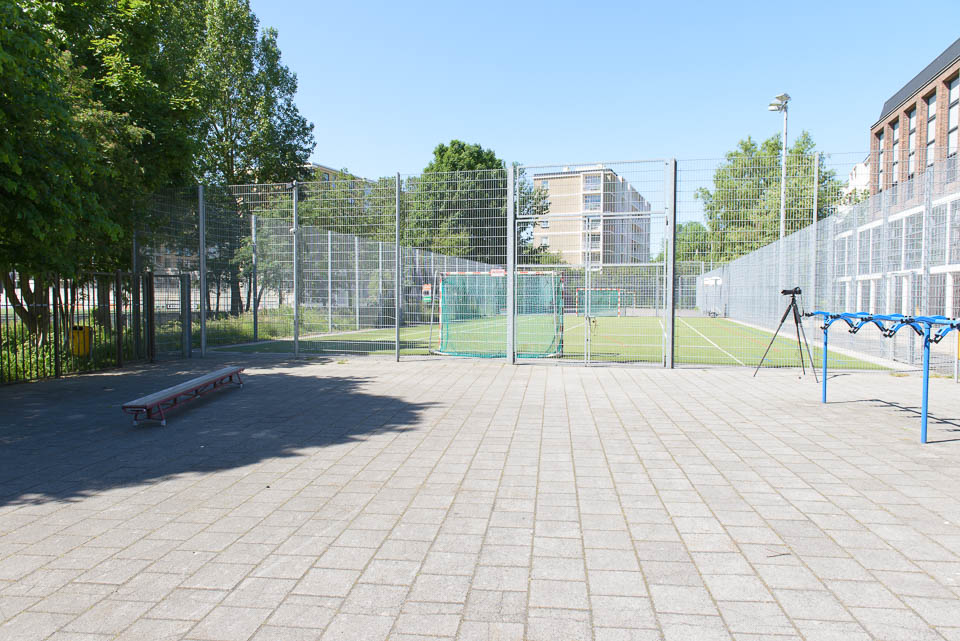
The bench in the shadow was the main 'stage', while the camera was about 10-15 meters away, put on a tripod (right in the picture) The lens used was 200 mm lens, set to about 135 mm. This focal length was good enough to compress the foreground with the background a bit.
The background was not perfect though. There were still some distracting elements there (like the fence and the bright part of the building's roof.

This was the moment of a trade off: lighting wise it was the best spot I could get, so I was pretty sure that the most important objects on the photo (children's faces) would be properly lit. The distraction I could eliminate, at least partially by careful composition and doing some post processing.
The last aspect to take care about was the color of light. Since the shadow was given by the trees, they could cause some color casting. To prepare for it I took several pictures of the color checker placed on the spot. I use X-Rite color checker for this purpose. X-Rite software integrates well with Lightroom and makes creation of the color profiles quite easy.
The limited time
This is almost always the case at school: tight rhythm of the day: 45 minutes lesson, 10 minutes break, next lesson. So is the time of the photoshoot. Per group I had roughly 5 minutes time: to set up the group, to take 1-2 test photos, do some reshuffling of children, cherry up some of them, calm down most of them, take the final picture.
Interesting observation is that teachers are not of much help in such situation: they are part of the group waiting for the directions. So it is important to have a plan and be ready to play the role of a 'director' of the shoot.
Direction and communication with the group
First of all I have pictured in my head the end result. To play safe I applied the simple principles to make the process simple: most people read visual information from left to right and from top to bottom. Another basic principle was to ensure that all the faces are good visible and not covered by other children or other obstacles. Having all this in mind the direction was straightforward: I created 2 rows, ordered taller children to step on the bench, less tall ones to stay on the ground. Then (if required) I reshuffled them to ensure that the rows visually form more or less straight line.
Again, it is the tradeoff, balancing the certainty of the final shot, the (limited) artistic values of the photo and limited time.
Each time I was explaining the process at the very beginning: I have noticed that this way I can have children's attention for at least couple of minutes.
To enhance communication I decided to use the trigger cable for releasing the shutter. So I was able to stay next to my camera and have direct contact with the group. It worked well, especially when I had to give some extra directions. For example, it is pointless to say to the group: "and now move 0,5 meter to the left". Instead I was making a step aside asking them to do the same. It worked well.
For the final shot I explained that I will be counting till 5 before taking the shot and was showing the number with my hand. In fact I was taking the actual shot at "3" or "4". This simple trick ensured that they all watched at me (or rather my hand) and I could catch their eyes on the picture.
Watch out the equipment
This is very important, especially when one stays on the playground. The thing is that the children start run and don't watch at the obstacles. So it is absolutely necessary to stand by the tripod and mark your spot this way. Otherwise there is a risk that they tackle the gear. This happened to me some time ago when one of the children run against the light stand with attached flashlight and an umbrella. As a result thereof I had to buy a new umbrella.


